Playlist
Show Playlist
Hide Playlist
Ultrasound of the Lungs


-
Emergency Medicine Pulmonary Trauma.pdf
-
Download Lecture Overview
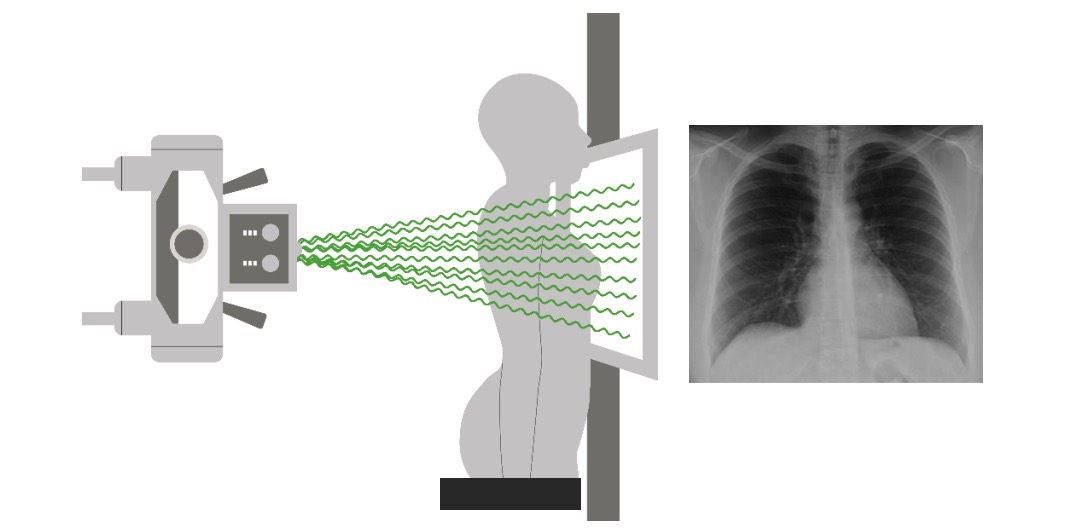
00:01 Alright, before we wrap up I just wanna take a few minutes and talk about ultrasound of the lungs and how we use that as an adjunct to our physical exam to identify life threatening pulmonary injuries at the bedside. 00:14 So back when ultrasound in the emergency setting was first introduced, we had the FAST exam. 00:22 It stands for Focused Abdominal Sonography in Trauma and it involved looking at the pericardium, both upper quadrants and the pelvis for bleeding. 00:32 Since then, we’ve added on an E and now we do the extended FAST exam which involves looking at both lungs and as well as the abdomen and pericardium and we’re looking for evidence of pneumothorax and hemothorax. 00:46 This has really become part of the standard FAST exam and it’s one of the procedures that every emergency physician is expected to be proficient in. 00:55 So what are we doing when we do an extended FAST exam? Well, first of we’re using a linear probe because we’re looking at relatively superficial structures, right? The chest wall’s only an inch or two thick and the lung is directly underneath of it so we’re gonna use a liner probe that’s designed to look at superficial structures. 01:13 The first thing we wanna do is identify the rib and I’ve outlined the rib on this image and I’ve also outlined the rib shadow. 01:20 So you get shadowing artifacts underneath of the ribs which makes it a little bit easier to identify them. 01:26 The pleura, which is also outlined on this image, is bright white and is visible just underneath of the ribs so it’s a pretty easy structure to find once you’ve identified ribs. 01:37 And what we’re looking for once we’ve identified the pleura is lung sliding which is basically movement of the visceral pleura relative to the parietal pleura during the respiratory cycle. 01:48 So as we all know, the lungs move continually throughout respiration, right? And these two layers of pleura slide back and forth relative to each other and that movement can be detected on ultrasound to help us rule out pneumothorax. 02:02 So the way we do that is we convert to M-mode on the ultrasound and we’re looking for something called the seashore sign. 02:09 So you can see on this image I’ve outlined the pleural line in green and then underneath of that pleural line you see what’s called a “sandy beach”. 02:20 It’s sort of a general gray haze that doesn’t have a whole lot of features and what’s actually causing that is the movement of the two layers of pleura in the underlying lung. 02:32 Structures that are stationary are gonna appear as very dark linear object in your M-mode whereas structures that are moving around are gonna be sort of blurry. 02:44 So if you look at the top of that image, you’re seeing the skin and the subcutaneous fat and maybe some rib and that sort of thing. 02:52 All of those things are very well defined bars because they’re stationary, they’re not moving, but the lung is always moving inside of the body which produces this hazy effect. 03:03 By contrast, here is an abnormal M-mode of a lung. 03:09 So now, once again, I’ve outlined the pleural line in green and here when you look under that pleural line instead of seeing that diffused gray haze, you’re actually seeing what we call the “barcode sign”. 03:20 You’re basically seeing well defined stripes underneath of the pleural space and this signifies that instead of the normal movement that you see with the pleura and the lung, that there’s actually a stationary air collection under there, the things underneath of the pleura are not moving the way that they’re supposed to and this is diagnostic of a pneumothorax. 03:42 Once again, the barcode sign. 03:44 Now, this is a lot easier to see in clinical practice and it’s something that every physician needs to spend some time working with and getting a feel for in the clinical setting but at least you have the basics of what you’ll be looking for. 03:59 So the bottom line on pulmonary injury are, one the pulmonary injuries are quite common in trauma and they can definitely be life threatening. 04:06 Two, we can use chest x-ray and ultrasound to help us confirm and clarify our diagnoses. 04:13 However, history and physical remains our most important diagnostic tool and we don’t wanna obtain radiographic confirmation of a life threatening injury that needs immediate treatment. 04:24 During the primary survey, we wanna identify and stabilize any life threats that we detect. 04:31 The most common and important one to know about is tension pneumothorax but we’re also looking for open pneumo, flail chest and massive hemothorax. 04:39 Thank you very much!
About the Lecture
The lecture Ultrasound of the Lungs by Julianna Jung, MD, FACEP is from the course Trauma (Emergency Medicine).
Included Quiz Questions
What is the normal sign observed in the M-mode of an eFAST lung exam?
- Seashore sign
- Barcode sign
- Sinusoid sign
- Stratosphere sign
- Bat sign
What sign indicates the presence of pneumothorax in the M-mode of an eFAST evaluation?
- Barcode sign
- Seashore sign
- Curtain sign
- Lung sliding
- Bat sign
What sonographic finding indicates the movement of the visceral pleura relative to the parietal pleura during the respiratory cycle?
- Lung sliding
- Double bubble sign
- Bat sign
- Curtain sign
- Barcode sign
Author of lecture Ultrasound of the Lungs

Julianna Jung, MD, FACEP
Customer reviews
5,0 of 5 stars
| 5 Stars |
|
5 |
| 4 Stars |
|
0 |
| 3 Stars |
|
0 |
| 2 Stars |
|
0 |
| 1 Star |
|
0 |
