Playlist
Show Playlist
Hide Playlist
Diagnosis of the Shoulder Region

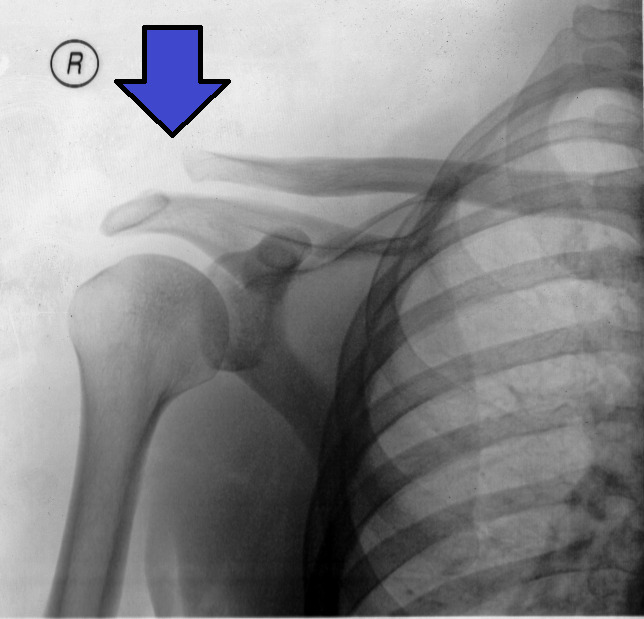
00:01 Osteopathic evaluation of the shoulder joint. 00:04 What we're going to do is start with our mantra of look, feel, move. 00:07 We want to take a look at the shoulder and see if there's any gross asymmetries. 00:10 You want to check both sides and compare sides, compare shoulder heights, look at the clavicles. 00:15 Does it appear even? Check for the position of the humerus. 00:19 Does one side appear the same as the other? Usually, evaluation of the shoulder, you want to look at the patients as they're walking, their gait, how they’re carrying themselves. 00:29 Are they protecting the shoulder or does one arm does not swing as much as the other. 00:34 It'll give you some clues as to what might be going around with the shoulder. 00:38 So we're going to palpate and feel next. 00:40 I'm going to kind of look at the clavicles, palpate some key landmarks, and see if there's tenderness present, the sternoclavicular joint, acromioclavicular joint, posteriorly the scapula, the muscles around the shoulder joint, and just feel and see if there's any sort of tenderness. 00:57 You have your humerus here and the greater and lesser tubercles where the long head of the bicep also runs through. 01:03 Sometimes we might be able to elicit tenderness along the anterior portion of the shoulder. 01:07 So palpating all your landmarks over the shoulder and the muscles is important. 01:13 To perform range of motion testing for the shoulder, what we're going to do is to perform gross motion testing, and we could do active or passive. 01:20 What we're going to do here today is to do active. 01:23 Remember that the shoulder moves on the glenoid. 01:26 So we want to stabilize the scapula as we're moving the shoulders to get the most accurate degrees of motion. 01:32 We're going to first test in the sagittal plane. 01:34 What we're going to do is we’re going to kind of support the elbow here, and I want you to relax. 01:38 I'm going to slowly extend the shoulder which you note how far it could come back. 01:43 Then we're going to flex. 01:44 The shoulder should be able to flex up to 180 degrees. 01:47 To test motion testing in the coronal plane, we're going to abduct the shoulder all the way up and bring it back down. 01:55 For adduction, because the body kind of gets in the way, we're going to bring the arm up forward a little bit so that we could adduct the shoulder and see how far it could adduct. 02:05 Finally, we're going to motion test in the coronal plane. 02:08 We just motion tested in the coronal plane and we're going to now test in the transverse plane. 02:12 For the transverse plane, we're going to test internal and external rotation. 02:16 For internal and external rotation, what we're going to do is we’re going to bring, with the shoulders stabilized and the elbow next to the body here, we're going to bring the hand towards the body for internal rotation, and away for external rotation. 02:27 Another way to do this is to bring the shoulder, abduct it to 90 degrees, this is zero, and we're going to let the hand fall forward for internal rotation and come up for external rotation. 02:39 It's important to stabilize the scapula here and the elbow. 02:42 If you let the elbow move too much, you could falsely create increased motion. 02:49 If we noted some sort of restriction of motion in the shoulder, then that could be a potential somatic dysfunction. 02:56 We name somatic dysfunctions for the restriction of motion, and then we name it for the freedom. 03:02 We're going to take an example. 03:06 If we had decreased shoulder flexion, let's say we can only flex up to 90 degrees, that is a left shoulder flexion restriction. 03:17 We name it for its freedom so this would be a left shoulder extension dysfunction. 03:21 The range of motion testing is important because that helps you to diagnose any sort of motion restriction, and then we name the somatic dysfunction for the freedom of motion. 03:31 There are a couple of special tests that we could perform to help confirm if a patient has a specific pathology of the shoulder. 03:40 The first test that we're going to look at, the Apprehension test, is a test that helps to check for possible instability of the left shoulder. 03:51 The shoulder tends to dislocate anterior and inferior. 03:55 What we're going to do with this test, if a patient comes in with complaints of instability of the shoulder, that they feel like, it feels like it's going to come out of the joint, they have that shoulder pain associated with it, we're going to actually recreate the possibility of that joint dislocating anterior and inferior. 04:13 I usually warn the patient that if I move the shoulder into uncomfortable position to let me know as soon as possible. 04:19 You don't want to actually cause and force an anterior dislocation of the shoulder. 04:24 But this test, the Apprehension test, is going to see if they’re apprehensive when that joint is at risk for dislocation. 04:31 So to perform this test, we're going to bring the arm up. 04:36 I'm going to hold on to the hand and externally rotate. 04:40 So we have the shoulder joint now pretty much abducted to 90 degrees, externally rotated fully. 04:48 My hand is going to be on the humerus and I’m going to be applying an anterior inferior force to see if the patient is apprehensive with me moving the shoulder in this position. 04:58 If the patient shows any sort of apprehension to it, meaning that they don't want me to do it, they may cry out, they may complain of pain, that would be a positive test. 05:07 A negative test would be if I do this position and they are able to tolerate the position. 05:15 If patients come in and they complain about shoulder pain and it's associated with some decrease in motion, or there’s shooting pain and it’s shooting down the arm, there are different tests that we could perform to try to discern the issue. 05:30 So one of the tests that we could do to perform a test to rule out any sort of rotator cuff issue especially the supraspinatus is the drop arm test. 05:42 What the drop arm test is doing, it is testing the integrity of the supraspinatus muscle because the supraspinatus muscle, remember, it does abduction of the shoulder. 05:52 What we want to do is to have the patient bring their arms up over the head and touch the back of their hands together. 05:59 What they're going to do is to slowly bring it back down to the sides of their body. 06:02 If they're able to do this smoothly, that means that the supraspinatus is intact. 06:07 If they were bringing it down, and all of a sudden the arm drops because they're unable to hold the weight of their arm up, that means that there might be compromise of the supraspinatus tendon. 06:16 We begin to think that there might be a possible rotator cuff tear and needing further evaluation from there. 06:24 The empty can test is a test that helps to test for any sort of rotator cuff tear. 06:28 Remember, the rotator cuff including the supraspinatus is the most commonly irritated muscle that could potentially be torn. 06:36 So what we want to do is to check for the integrity of the person able to abduct their arm against resistance. 06:42 So I'm going to start by internally rotating the hand on both sides and have the patient hold up their arms pretty much at 90 degrees on both sides. 06:51 In this position, you're going to test now by gently tapping on their shoulder to see if they could resist that force and keep their arms up. 07:00 If I tap and they're able to resist, that is a negative test. 07:04 However, if I tap and the effect is this side kind of just drops, then that is a positive test because they're not able to hold their arm up against the resistance and there might be a tear of one of the rotator cuff muscles. 07:16 Sometimes patients may come in complaining of shoulder pain especially with certain motions and movements. 07:21 Remember that in the suprahumeral space, you have a lot of important structures. 07:26 Some tendons run through there. 07:28 There's some tissue there. 07:29 That space is dependent on the scapula moving when you move your humerus. 07:34 So certain motions can impinge or compress on the tissue in that area and cause pain throughout the shoulder. 07:41 Flexion, abduction, and internal rotation tend to narrow that space in that suprahumeral space. 07:48 So what we do with the Neer’s test is a test for impingement syndrome. 07:53 We're going to add the two motions to try to narrow down that suprahumeral space. 07:58 We're going to start with internal rotation, and then I'm going to passively bring the arm up to 180 degrees. 08:05 A patient that has pain in the area or is unable to fully reach that range is going to complain of pain. 08:13 That's going to be a positive test. 08:15 A negative test is to be pain-free as I do the motion fully. 08:21 We have the Hawkins' test. 08:23 What the Hawkins' test does is it also will compress the suprahumeral space with particular motions. 08:31 So the Hawkins' test will start with flexion. 08:35 Holding and supporting the elbow, I'm going to add internal rotation to the shoulder. 08:40 That will compress the suprahumeral space. 08:43 If you have pain with that motion, that would be a positive test. 08:48 A negative test would be lack of pain and being able to fully perform the motions there. 08:56 If a patient complains of shooting pain down the arm, it could potentially be from compression of the brachial plexus. 09:03 Thoracic outlet syndrome is compression of the brachial plexus in three possible areas. 09:09 What we're doing with the Adson’s test is to try to recreate that compression. 09:15 Remember, the brachial plexus is a nerve bundle that runs also with the blood vessels. 09:20 It's a neurovascular bundle that runs from the neck all the way down to the hand. 09:26 So what we're monitoring here is whether or not the blood vessels are compressed with certain motions of the neck. 09:34 The Adson’s test, I'm going to feel for pulse. 09:37 I'm on the radial side here by the thumb. 09:40 Once I assess that pulse, I'm going to slowly bring the arm up to 90 degrees of abduction, and then I'm going to ask the patient to slowly bring their head side bending towards me, and then also rotating their head a little and adding extension. 09:57 This motion will compress the thoracic outlet region. 10:01 If I feel a loss of pulse, that would be a positive test for thoracic outlet syndrome. 10:07 You can bring your head back. 10:08 If we perform that motion and I still feel the pulse, then that's a negative test. 10:16 If the patient has pain shooting down the arm, that could be potentially from a nerve root compression. 10:22 A cervical disc could protrude posteriorly and compress on those cervical roots. 10:28 The Spurling's test will test for any sort of cervical root compression. 10:34 What we're doing with the Spurling's test is we're narrowing the foramina where the nerves exit and recreating any sort of compression there and seeing if that causes pain shooting down the arm. 10:47 For the Spurling's test, what we're going to do is first, we're going to position the patient into a little extension, side bending towards and rotating towards the affected side. 10:56 If the patient has pain then, you want to stop. 10:58 That's a positive test. 11:00 If they don't have pain, what you’re going to do is you’re going to add an axial compression to further narrow the foramina to see if it recreates symptoms. 11:07 So I'm going to gently put my hands on top of the head and slowly push down providing axial compression and seeing if that recreates the pain. 11:16 If the pain, if any pain, is reproduced radiating down the arm, that is a positive Spurling's test which indicates that there might be some sort of nerve root disorder and compression in the cervical spine. 11:31 Patients with anterior shoulder pain, we may suspect some sort of bicipital tendon issue. 11:37 So if we suspect bicipital tendon inflammation or pain or instability, we could perform a Yergason’s test. 11:44 Yergason’s test is a test where we're going to be activating the biceps muscle. 11:50 Remember, the biceps muscle is a strong elbow flexor and also a strong supinator. 11:58 So we're going to activate supination here to test the biceps muscle. 12:03 First, we're going to find the bicipital groove by finding the greater and lesser tubercles of the humerus, and then here is the tendon itself. 12:11 Remember, the tendon is held in by a thin ligament. 12:14 Sometimes that ligament could be disrupted. 12:17 We want to see if that ligament is also intact with this test. 12:21 So my thumb is going to cover that region of the groove. 12:25 My other hand is going to support the forearm. 12:28 I'm going to keep the elbow close to the body. 12:31 I'm going to take the forearm and I'm going to ask the patient to try to supinate or turn their palm up against my resistance. 12:40 I'm going to hold it a little bit in pronation. 12:42 Go ahead and try to turn your palm up for me and relax, good. 12:46 So when the patient supinates against my resistance, I'm assessing whether or not I feel any sort of click in the bicipital groove. 12:55 If the tendon is unstable, it may come out of that groove. 12:59 If pain is recreated, then that would be a positive Yergason’s test for bicipital tendonitis or instability. 13:07 Apley’s scratch test is a range of motion test that we could try to screen for any sort of range of motion restriction. 13:14 This is an active test. I'm going to ask the patient to do three different things trying to use their hand to reach the opposite scapula. 13:22 First, I'm going to ask the patient to take their hand and try to reach behind their back and try to touch their opposite scapula. 13:30 You can relax your arm. 13:31 You, as a physician, you're going to note how far they could reach. 13:35 Go ahead and reach with your opposite arm. 13:37 Very good. Relax your arm. 13:39 So here, we note that there is a clear asymmetry with how far the patient could reach. 13:46 The second motion is to have the patient reach across their neck to touch their opposite scapula. Good. 13:52 Now, the other side. Good. 13:55 You can relax your arms. 13:56 So here, it appears a little bit more symmetric. 14:00 Then the third motion is to have them take their hands and slowly bring it behind their head to touch the opposite scapula. Good. 14:10 The other side. Good. Relax. 14:13 So here also, fairly symmetric. 14:16 What we noted was that there was a lot of decreased range of motion in the right shoulder in the ability to touch the opposite scapula. 14:25 So when you note an asymmetry, that is a positive Apley’s scratch test. 14:29 When you have a positive test, that indicates that you have to further test the affected shoulder. 14:34 What does each motion that the patient goes through with their hand mean? So if a patient cannot reach behind their back to touch the opposite scapula, your main motions are extension and also internal rotation to come and try to touch the opposite scapula. 14:55 If a patient cannot reach across their neck to touch the opposite scapula, it's going to be a combination of abduction, flexion, and adduction to touch the opposite scapula. 15:08 If they can't reach behind their head to touch the opposite scapula, it's going to be a combination of flexion, and then external rotation, and then touching the scapula there. 15:19 So when you have an asymmetric finding, then you need to further motion test the shoulder to narrow down which motion is restricted.
About the Lecture
The lecture Diagnosis of the Shoulder Region by Sheldon C. Yao, DO is from the course Osteopathic Diagnosis of the Shoulder Region.
Included Quiz Questions
Though which of the following anatomical planes does the shoulder move through when testing flexion and extension of the shoulder?
- Sagittal
- Coronal
- Transverse
- Horizontal
- Vertical
What is the initial position of the shoulder joint when assessing instability with the apprehension test?
- Abducted to 90 degrees, externally rotated to 90 degrees
- Adducted to 30 degrees, externally rotated to 90 degrees
- Abducted to 180 degrees, externally rotated to 90 degrees
- Adducted to 90 degrees, internally rotated 15 degrees
Which of the following tests is commonly used in the assessment of dysfunction of the supraspinatus muscle?
- Drop arm test
- Neer test
- Hawkin's test
- Adson’s test
- Spurling's test
Which of the following clinical exam tests is commonly used during the examination for impingement syndrome?
- Neer test
- Yergason’s test
- Drop arm test
- Adson’s test
- Spurling’s test
Which of the following is a physical examination test which is provocative for thoracic outlet syndrome and involves assessing the patient's pulse in response to changes in position of the arm and neck?
- Adson’s test
- Neer Impingement test
- Yergason’s test
- Drop arm test
- Spurling’s test
The Yergason’s test is physical examination test which is performed with the palpating thumb on what anatomical location?
- Bicipital groove
- Humerus head
- Greater tubercle
- Lesser tubercle
- Acromion
Author of lecture Diagnosis of the Shoulder Region

Sheldon C. Yao, DO
Customer reviews
5,0 of 5 stars
| 5 Stars |
|
1 |
| 4 Stars |
|
0 |
| 3 Stars |
|
0 |
| 2 Stars |
|
0 |
| 1 Star |
|
0 |
In one word excellent, clear explanation, thank you, looking forward to the upcoming videos.
